

Something that I have been thinking about a lot lately, as the time draws closer to me having my own secondary English classroom is:
How can I inspire my students to find joy and fulfillment in their daily lives and have this all tie into my high school English curriculum?
I have been pondering this for a while because with school bullying on a rampage, at all grade levels, and the school environment lending to a competitive atmosphere, I want to make sure that there is some level of respect and joy being shared in the hallways or at least in my classroom.
(This could also be on my mind because I just read Jodi Picoult's, Nineteen Minutes, which is about a school shooting... a good book though that hits on relevant issues in schools today).
I came across a wonderful idea yesterday though that I thought I would share with you because I think that this is a great exercise for just about everyone, at any age.
The Gratitude Journal. This idea came from one of the girl's in my class and when I came home I researched it and found some very cute ideas lending to a fun craft as well.
Students (or whoever, whenever) will create a gratitude journal and will spend the first 10 minutes of each class journaling about something that they are thankful for in their life that day. This project not only forces students to focus on something positive in their day - be it the sunshine, a delicious breakfast, a friend, a nice pair of socks, a puppy that they saw - whatever it may be; but it also gives the students a log of things that they are grateful for to reflect on when they are having a down day. I think that this small portion of the beginning of each class will get the class (or your day) off to a positive, refreshing start.
(As a side note: if you are ever having a rainy day and need some uplifting inspiration or just a reminder about some of the finer things in life visit: Thingstobehappyabout.com).
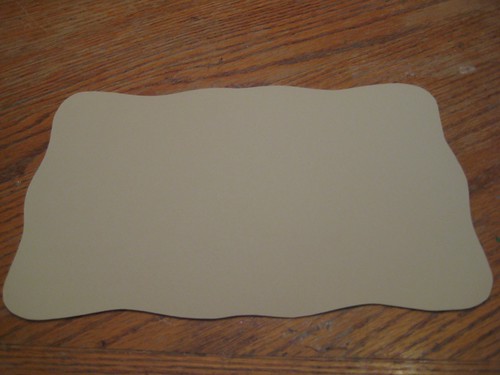
Art is also a relaxing outlet and so, of course, you will need to create a personalized journal. Here is one adorable journal that I found on the "pursuit of craftyness" blog:

(Below are the instructions she gives on how to create a similar gratitude journal on your own):
Instructions:
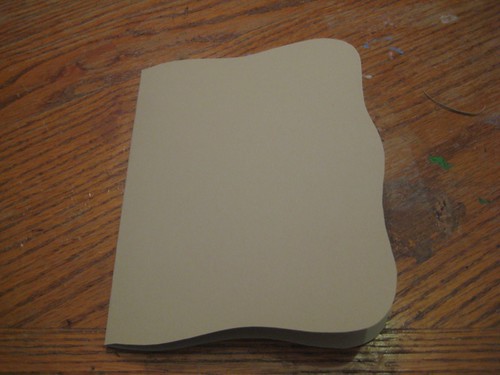
To make the cover and back of the journal, I cut 2 - 6"x8" pieces of thin chipboard. It's important that it be thin enough to machine stitch through and to add eyelets. I also cut 2 - 6"x8" pieces of fusible fleece to give the cover a little bit of a quilted look. I cut the fabric larger (2 - 8" x 10" pieces of muslin) and then stamped my images onto the fabric.

I layered the fusible fleece onto the back of the fabric and ironed the stamped side to secure the fleece. This also heat set the ink in the process. I added my thin chipboard to the back of the fleece and wrapped the excess fabric around the edges and corners. I added a few stitches at the corners to tighten the wrap and further secure the fabric from slipping.

Once all the corners were done, I machine stitched 1/8" around the edge of each piece (front and back covers) twice.
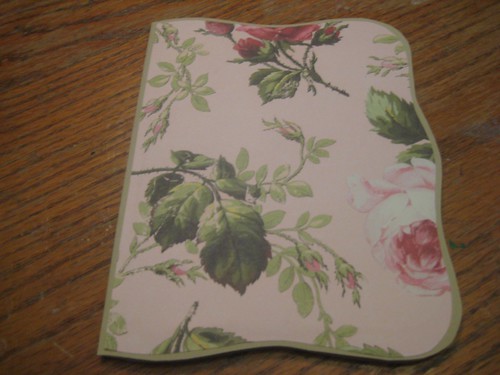
At this point, I created a few embellishments to dress up my journal.
-The paper flower: The leaves were punched, inked, distressed and machine stitched in place. The flower is a stack of graduated punched circles that were also inked and distressed. I layered and adhered them together slightly off-center so that the different patterns and colors could still show through. I used a paper pierce tool to punch holes in the center and added the button with embroidery thread with a large needle tying the thread behind the chipboard.
-The mini blue ribbon flower: This is made using regular thread and needle stitching along one edge of the length of ribbon - about 2 1/2" long. Then gather the thread to cinch the ribbon into a circular shape. I adhered it to the cover with an adhesive square and added the gem to the center.

-The lace trim: With this I weaved the 3/8" wide ribbon through the lace, wrapped it around the cover and machine stitched across the center of the ribbon several times to secure it in place.
-The heart stamp: I created a stamp like square with pattern papers and scallop decorative scissors. I stitched it onto the cover and added punches and other embellishments.
To make the cover and back of the journal, I cut 2 - 6"x8" pieces of thin chipboard. It's important that it be thin enough to machine stitch through and to add eyelets. I also cut 2 - 6"x8" pieces of fusible fleece to give the cover a little bit of a quilted look. I cut the fabric larger (2 - 8" x 10" pieces of muslin) and then stamped my images onto the fabric.

I layered the fusible fleece onto the back of the fabric and ironed the stamped side to secure the fleece. This also heat set the ink in the process. I added my thin chipboard to the back of the fleece and wrapped the excess fabric around the edges and corners. I added a few stitches at the corners to tighten the wrap and further secure the fabric from slipping.

Once all the corners were done, I machine stitched 1/8" around the edge of each piece (front and back covers) twice.
At this point, I created a few embellishments to dress up my journal.
-The paper flower: The leaves were punched, inked, distressed and machine stitched in place. The flower is a stack of graduated punched circles that were also inked and distressed. I layered and adhered them together slightly off-center so that the different patterns and colors could still show through. I used a paper pierce tool to punch holes in the center and added the button with embroidery thread with a large needle tying the thread behind the chipboard.
-The mini blue ribbon flower: This is made using regular thread and needle stitching along one edge of the length of ribbon - about 2 1/2" long. Then gather the thread to cinch the ribbon into a circular shape. I adhered it to the cover with an adhesive square and added the gem to the center.

-The lace trim: With this I weaved the 3/8" wide ribbon through the lace, wrapped it around the cover and machine stitched across the center of the ribbon several times to secure it in place.
-The heart stamp: I created a stamp like square with pattern papers and scallop decorative scissors. I stitched it onto the cover and added punches and other embellishments.

I also added other buttons, a decorative brad to the mix as well as the printed strips of cardstock.
Once my embellishments were complete, I covered the back side of each cover with a 6" x 8" piece of cardstock to hide all the stitching and brad prongs. I adhered this with the permanent adhesive squares.
I punched holes in both the front and back covers and added red eyelets for the binder rings as well a few orange 1/8" eyelets just for fun. I kept the back cover simple with stamping only and the red eyelets for the binder rings, but this could also be more embellished if you choose. I tied several ribbon strips - each about 6" long - to the top binder ring.
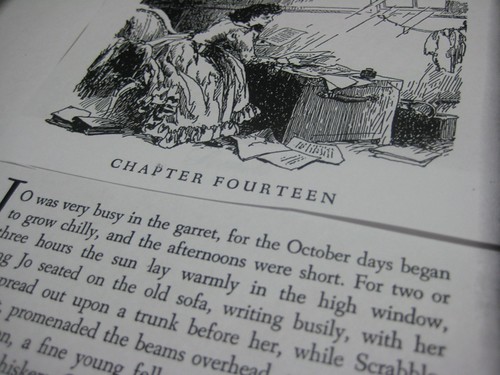
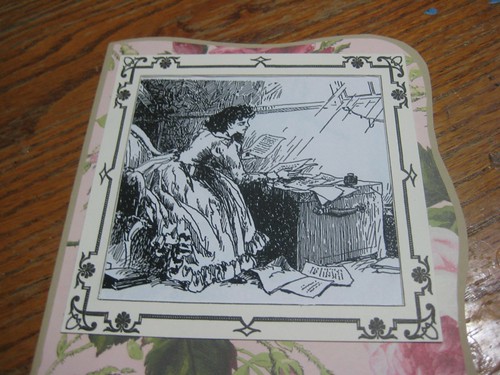
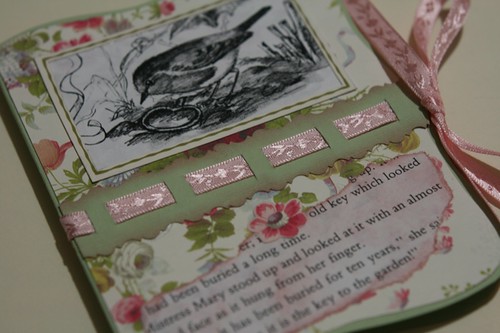
And here is one more beautiful example that as a future English teacher I couldn't pass up :)
This one comes from the "There is no place like home" blog.

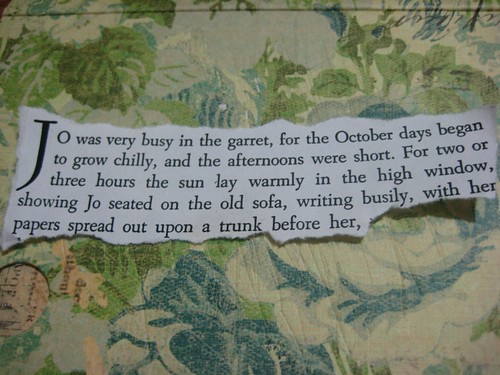
I adore the idea of using an old picture from your favorite book along with one of your favorite quotes. What better way to inspire your own writing?
Here are her instructions on creating this yourself:

I use a cardboard template that I found at Michaels awhile back, but the main size is 9" x 6"
Cut a 9" x 6 " rectangle from cardstock.
Fold in half.
Cover with a 5 3/4" x 4 1/4" piece of scrapbook paper.
Photocopy a picture and quote from a favorite book.

I add a paper frame around the picture, but this is optional.
Glue to front of journal.
Tear around quote.
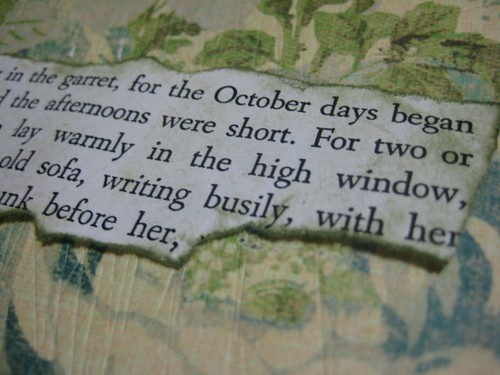
Dab edges with matching ink pad.
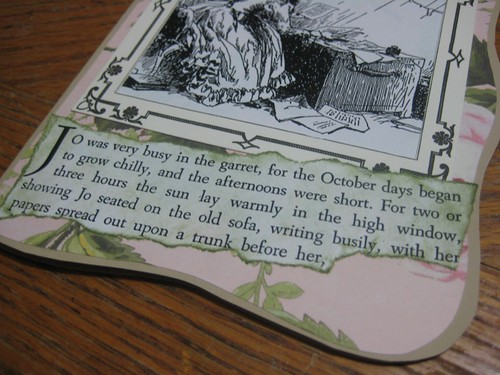
Glue to front of journal.
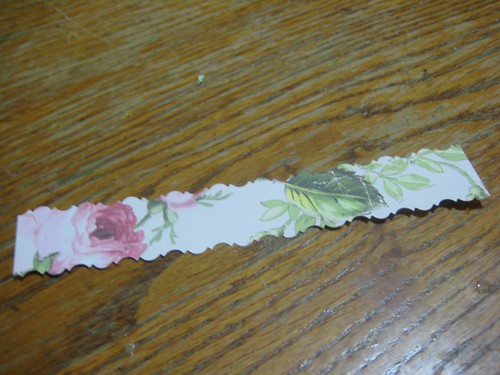
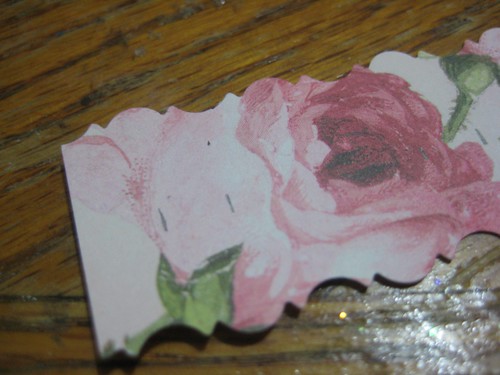
Cut a 4 1/2" x 1" strip of matching scrapbook paper. Trim top and bottom edges with decorative scissors.
Make small pencil marks at the following measurements (from left to right): 1/4", 1/2", 1 1/4", 1 1/2", 2 1/4", 2 1/2", 3 1/4", 3 1/2", 4 1/4"

With a craft knife, make small slits at the pencil marks.
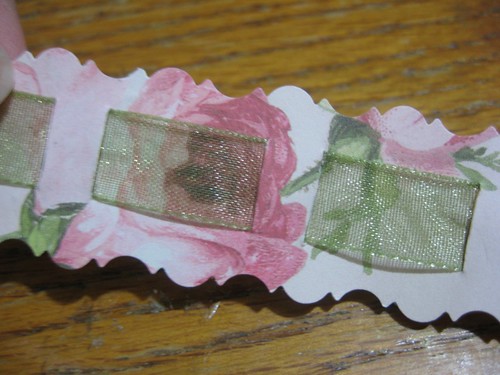
Thread a 28" length of ribbon through slits, as shown.

Glue ribbon strip to front of journal.

Add stickers or other embellishments.
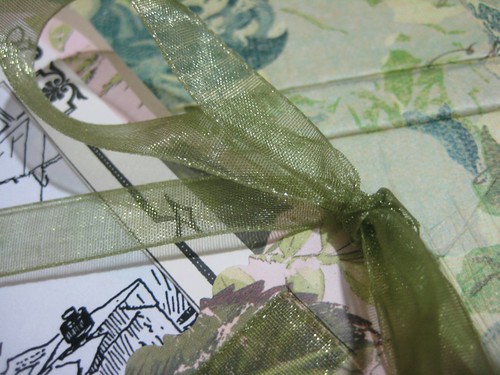
Bring ribbon around the back of journal and tie a bow on the right side.
Tuck folded sheets of cardstock inside journal for pages to write on. They are not attached in any way, just held in by the ribbon.
*These little journals may make awesome Christmas gifts as well.... just a thought :)
"This is the day that the Lord has made; let us rejoice and be glad in it."
-Psalm 118:24
No comments:
Post a Comment